Disclaimer: this bulk-import strategy requires running SQL against your WordPress’ MySQL database. If you prefer not to touch databases directly, you should consider going the plugin route. Also, this example uses a list of continents and countries which may or may not apply to your particular circumstances.
The best wordpress plugin that I found to help me with my bulk import task required having my list of categories and subcategories in text format as follows:
Category 1
-Subcategory 1a
-Subcategory 1b
Category 2
-Subcategory 2a
.....
Which wasn’t quickly achievable considering I had my list in a CSV file. I decided to use Google Sheets to transform the data into SQL queries, which I could run directly in MySQL.
The SQL required to enter a single category is as follows:
INSERT INTO wp_terms (name, slug, term_group)
VALUES ('[country]', '[country-slug]', 0);

INSERT INTO wp_term_taxonomy(term_id, taxonomy, parent)
VALUES(LAST_INSERT_ID(), 'category',[parentId]);
Notice the “LAST_INSERT_ID()” function on line 5.
So this is a list of values we need to extract using Google Sheets:
- A country name
- The country name as a slug
- It’s parent continent Id
- All the above formatted as an insert statement like in the snippet above
The following steps lead to creating queries containing the values above:
- Create the parent categories manually:
Manually insert the list of 7 continents using the WordPress CMS. This will take up a good 3 minutes out of your day so plan accordingly. - Store the parent category Ids
Access the MySQL database and find IDs of the seven entries you made above. Or, if you want to go the low-tech route, hover your mouse over the categories you created to see their “tag_ID”. Make a note of these somewhere eg.North America - 1 South America - 2 etc.
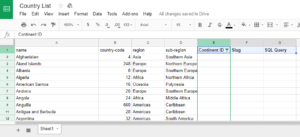
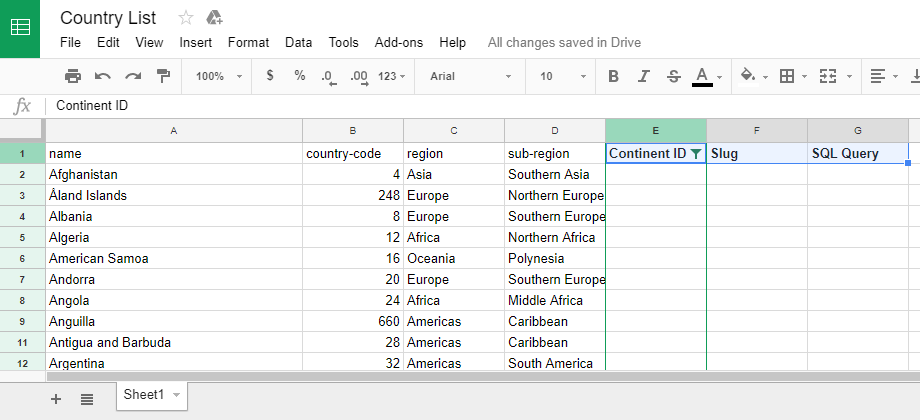
- Import your CSV file into Google Sheets:
If you already have a CSV file with continents and regions, you can just copy and paste your csv into the first cell of an open Google Sheet, then navigating to Data > Split text into columns. If not, you can download the one attached to this post, which comes with the downside of having had all the fun work done for you. - Create new columns in Google Sheets:
Create three new columns for the values we are going to add to the spreadsheet (ie. the parentId that maps to a continent, the Slug, and the SQL Query)
- Assign Parent Category IDs
In the first cell below the header for the ContinentID, enter the following formula using the values you gathered from step 2:=IFS(C2="North America", 1, C2="South America", 2,...)A quick explanation. The IFS function in Google Sheets is a multiple condition if-statement which works as follows:
IFS(C2="Pineapple", "Fruit", C2="Lettuce", "Vegetable", C2="BMW", "Car"...).
Once you are done with the first non-header cell, just drag the formula down to the other cells to populate the Ids for the other continents.
- Create your Slugs
For the slug, you’re going to need a Google Sheets function that strips out spaces and replaces them with dashes while lowercasing your text. I found one here. To use it, access the Tools > Script Editor.. menu from your Google Sheet. Copy and paste the script into the editor and save it. Now in the first empty cell in the “Slug” column you created, paste the following:=Slugify(A2:A250)
You might have to modify the cell references based on where your country name column is, and how many rows it contains. You should immediately see a the column fully populated with the slug version of all the country names.
- Create your SQL Query
Now it’s time to craft a query from all your newly added values. It comes down to simple string concatenation. In the first empty cell of your SQL Query column, paste the following:=CONCATENATE("INSERT INTO wp_terms (name, slug, term_group) VALUES ('",Substitute(A2, "'", "\'"), "', '", F2, "', ", 0, "); INSERT INTO wp_term_taxonomy(term_id, taxonomy, parent) VALUES(LAST_INSERT_ID(), 'region',", E2, ");")Again, note that the cell references might have to change based on your column positions. Click and drag down to apply the formula to all cells in the column. Now you should have your ready-to-run SQL queries to install 200+ categories in a single click.Copy the entire SQL Query column, excluding the header into PHPMyAdmin (or wherever you run your MySQL queries) and run the script. And that should be it. All categories should appear inside wordpress.
Issues to look out for:
- The Slugify function does not remove unicode characters, so expect to see the occasional accent on characters in your slug. Not sure if this is a problem yet.
- For my personal use, I created a new taxonomy so that I could keep my list of countries separate from the regular categories. This would have the benefit of deleting all entries for that particular taxonomy should things go awry.
Possible Improvement:
Ideally a single function could be written to handle the “slugify” functionality and spawn the SQL queries.